- Полный список
- How to build a simple calculator app – full tutorial with code
- Creating the project
- Enable data binding in your project
- Designing the Calculator layout
- Understanding the layout widgets
- Building the Calculator layout
- Calculator internals
- Handling button clicks (numbers)
- Handling button clicks (operators)
- Finally
- How to Make a Scientific Calculator Android App using Android Studio?
- What we are going to build in this article?
- Step by Step Implementation
- Build a Simple Android Calculator App in 5 Steps – Full code tutorial and explanation
- What will you learn?
- Building the interface of the simple calculator in Android
- Requirements
- Coding the Functionality of our simple calculator
- Step 1: Creating objects for our elements
- Step 2: Fetching values from the elements into the working of our app
- Step 3: Changing the EditText value by pressing the buttons.
- Step 4: The functional buttons
- Step 5: Calculating, the actual functionality
- Flaws of this android calculator app that are not covered in this post
- Full Code for the User Interface for Android Simple Calculator App
- Full Code Tutorial for the Functionality of Android Calculator App
- 2 thoughts on “ Build a Simple Android Calculator App in 5 Steps – Full code tutorial and explanation ”
- Leave a Reply Cancel reply
Полный список
В этом уроке мы:
— пишем приложение — калькулятор
Попробуем написать простейший калькулятор, который берет два числа и проводит с ними операции сложения, вычитания, умножения или деления. Результат отображает в виде полного выражения.
Project name: P0191_SimpleCalculator
Build Target: Android 2.3.3
Application name: SimpleCalculator
Package name: ru.startandroid.develop.simplecalculator
Create Activity: MainActivity
Откроем main.xml и нарисуем экран:
Тут есть два поля ввода, 4 кнопки и текстовое поле для вывода. Обратите внимание на атрибут inputType для EditText. Он задает тип содержимого. Я указал numberDecimal – т.е. в поле получится ввести только цифры и запятую, буквы он не пропустит. Это удобно, не надо самому кодить различные проверки.
Для TextView указан атрибут gravity. Он указывает, как будет расположен текст в TextView. Не путайте с layout_gravity, который отвечает за размещение TextView в ViewGroup.
Теперь нам надо читать содержимое полей, определять какую кнопку нажали и выводить нужный результат. Открываем MainActivity.java и пишем код
Думаю, все понятно по каментам. Читаем значения, определяем кнопку, выполняем операцию и выводим в текстовое поле. Обработчиком нажатий на кнопки выступает Activity.
Все сохраним и запустим.

Давайте для большего функционала сделаем меню с пунктами очистки полей и выхода из приложения. Пункты будут называться Reset и Quit.
Добавим две константы – это будут ID пунктов меню.
(добавляете только строки 3 и 4)
И напишем код создания и обработки меню:
Сохраним все, запустим. Появилось два пункта меню:
Reset – очищает все поля
Quit – закрывает приложение
В качестве самостоятельной работы вы можете реализовать проверку деления на ноль. И выводить какое-нить сообщение с помощью Toast или прямо в поле результата.
На следующем уроке:
— рассмотрим анимацию View-компонентов
Присоединяйтесь к нам в Telegram:
— в канале StartAndroid публикуются ссылки на новые статьи с сайта startandroid.ru и интересные материалы с хабра, medium.com и т.п.
— в чатах решаем возникающие вопросы и проблемы по различным темам: Android, Kotlin, RxJava, Dagger, Тестирование
— ну и если просто хочется поговорить с коллегами по разработке, то есть чат Флудильня
— новый чат Performance для обсуждения проблем производительности и для ваших пожеланий по содержанию курса по этой теме
Источник
How to build a simple calculator app – full tutorial with code

Continuing the Android Authority tradition of building simple apps (see how to build an image gallery app and how to create an SMS app), we are going to build a simple but functional calculator app. If you’re new to programming and have never built an app before, you should check out our previous tutorial on writing your first Android app. This tutorial assumes that you have at least, some basic experience writing Android apps.
Much like developing any non-trivial program, there is more than one way to do it, and if you get ten different programmers, you might get ten different ways of writing a calculator (unless they all happen to be Android Authority readers *wink*). The complete source for the calculator app written below is available on github for use, reuse and modification as much as you like.
Creating the project
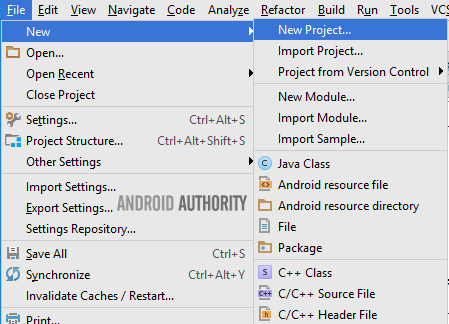
The first thing to do is create a new project by either clicking on “Start a new Android Studio project”, or ‘File -> New -> New Project’.
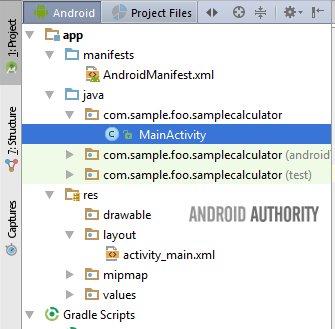
For this calculator tutorial, we selected the EmptyActivity option on the “Add an Activity to Mobile” screen, and left the Activity name as the default MainActivity. At this point, your layout hierarchy should look like the image below. You have a MainActivity within your project package, and an activity_main.xml file in the layout directory.
Enable data binding in your project
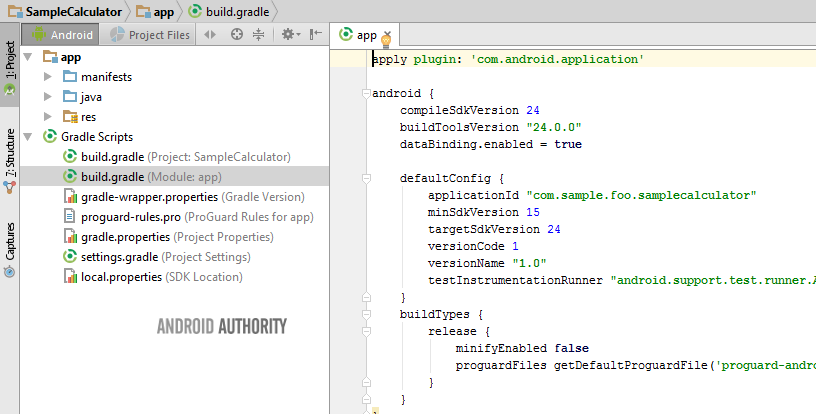
For our sample calculator, we will setup our project to use data binding. Using data binding in this app simply helps us refer to our widgets (Buttons, EditText and TextView) directly, rather than finding them with findViewById() methods. To enable data binding, you must add the following line to your app build.gradle file.
Designing the Calculator layout
To enable data binding in our activity_main.xml file requires one last change. Wrap the generated root tag (in our case it was a RelativeLayout) within a layout tag, making the layout tag the new root tag.
The layout tag is what alerts the build system that this layout file intends to use data binding. The build system then generates a Binding class automatically for this layout file. Since the target xml file is named activity_main.xml, the build system will generate a class called ActivityMainBinding, which you can reference in your app like any other Java class. The class name is generated from the layout file name by capitalizing the first letter of each word after an underscore, removing all underscores, and adding ‘Binding’ to the name.
At this point, switch to your MainActivity.java file. Create a private ActivityMainBinding instance within your class, and in the onCreate() method, delete the setContentView() line and replace with the DataBindingUtil.setContentView() line in the code snippet below.
Understanding the layout widgets
There are four main items in our calculator app. These are:
- RelativeLayout – this item governs how the other items are laid out, or displayed on the screen. The RelativeLayout is used to position child elements in relation to each other, or to itself.
- TextView – this item is used to display text. Users are not expected to interact with this item. The result of computations are displayed using a TextView.
- EditText – this is a kind of TextView that users can edit, and change the text. However, since the calculator allows only a fixed set of inputs, we set the edit text to be non-editable. When the user clicks on numbers, we display the numbers in the EditText.
- Button – this item allows interaction by the user, and ideally, should respond to clicks by the user. We use buttons for the numbers, and operators in the calculator.
Building the Calculator layout
The calculator layout is a bit long. This is due to the fact that we have to explicitly define, and meticulously position, each of the buttons in the calculator. The snippet below is a condensed version of the activity_main layout file
Calculator internals
Our calculator has two values, valueOne and valueTwo. These values hold the numbers to be operated on. Both values are of type double, so they can hold numbers with and without decimals. We set valueOne to the special Double value NaN (not a number) for reasons that will be clearer below.
This simple calculator can only perform operations of either addition, subtraction, multiplication or division. So we define four static chars to represent these operations, and a CURRENT_ACTION variable, which holds the next operation we intend to perform.
Finally, we use the DecimalFormat class to format the output of our calculator. The decimal format constructor permits displaying up to ten decimal places.
Handling button clicks (numbers)
Whenever the user clicks a number (or dot), we simply want to add that number to the editText. The code sample below shows how we accomplish this for number zero (0).
Handling button clicks (operators)
Handling clicks on operators is a little different. We would like to perform any pending computations first. So we define a computeCalculation method. Within computeCalculation, if valueOne is a valid number, we read valueTwo from the editText, and perform the current queued operation. On the other hand, if valueOne is NaN, valueOne assigned the number in the editText.
For every operator, we call computeCalculation() first, then set CURRENT_ACTION to the selected operator, while for the equals ‘=’ operator, we call computeCalculation(), then clear the contents of both valueOne and CURRENT_ACTION.
Congratulations! You have completed your simple calculator Android app.
Finally
If you run and use the above app, you will notice some possible areas of improvements, such as 1) click an operator when the editText is clear (i.e. without entering a number first), 2) allow the user continue calculating after clicking the equals button.
As always, the complete source is available on github, and you are free (nay encouraged) to modify, and use, to your heart’s content. Hola in the comments if you found this useful, and/or want to recommend an app for a future tutorial.
Источник
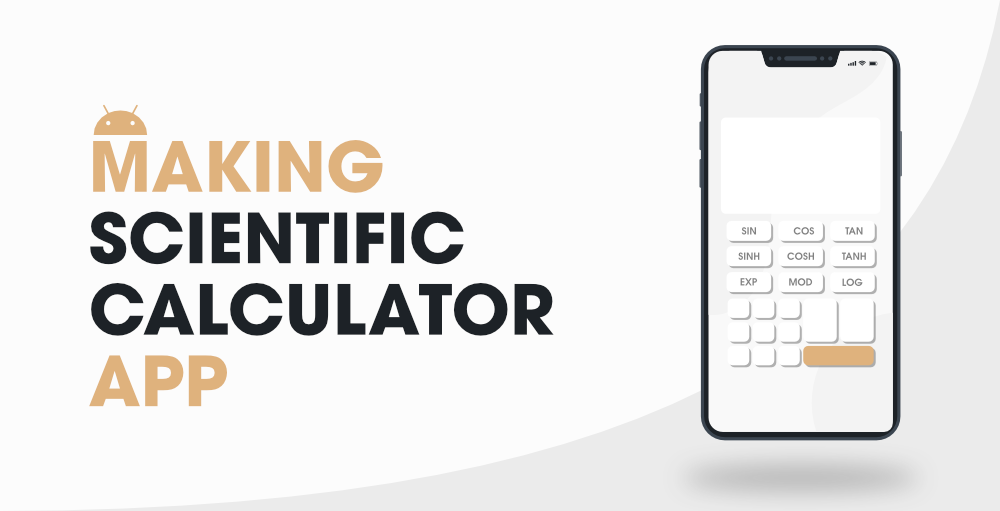
How to Make a Scientific Calculator Android App using Android Studio?
The calculator is the app that is present on every android device. This app comes pre-installed or we can also install another application from Play Store. It is one of the most used applications for college students for making any calculations. In this article, we will take a look at building a simple scientific calculator app in Android using Kotlin.
Note: To build a simple calculator app please refer to this article How to build a simple Calculator app using Android Studio?
What we are going to build in this article?
We will be building a scientific calculator in which we will be performing several mathematical operations such as addition, subtraction, square root, factorial, and many more. A sample video is given below to get an idea about what we are going to do in this article.
Step by Step Implementation
Step 1: Create a New Project
To create a new project in Android Studio please refer to How to Create/Start a New Project in Android Studio. Note that select Java as the programming language.
Источник
Build a Simple Android Calculator App in 5 Steps – Full code tutorial and explanation
What will you learn?
- Using OnCLickListener to interact with buttons. You can read about OnClickListener in detail before proceeding, although it isn’t required.
Note: Find the full code of the android calculator project towards the end of the post. Read the entire post for further clarification and explanations.
Building the interface of the simple calculator in Android
As with all applications, we should always start by creating the interface. For the android calculator app, we require the following elements.
That’s it. We use the textView to show users the numbers they have written and also to display the result of the calculations we are going to do.
Each of the numbers will have a different button, from 0-9 and we will have four additional buttons for addition, subtraction, multiplication and division. Other than this, we require a button to calculate the operation, a button for decimals, and a button to clear the display.
Requirements
1. EditText: To display numbers and the result.
2. Button: Numbers 0-9
3. Button: Operational buttons (+, -, *, /, =)
4. Button: Decimal button
5. Button: Clear display button.
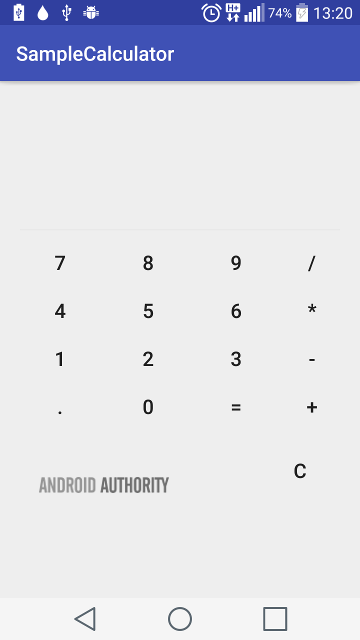
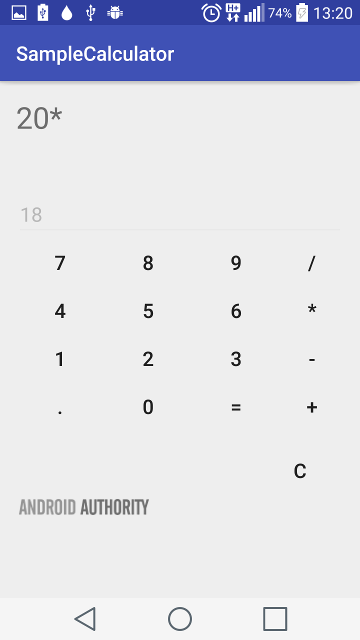
Here’s a screenshot of what the code at the bottom would look like if you were to paste it in your activity_main.xml file.
Coding the Functionality of our simple calculator
Step 1: Creating objects for our elements
In your Java file, which is almost always MainActivity.java by default, head on over to the MainActivity extends AppCompatActivity class. Inside that, create objects for all of your 15+ buttons and an object for your EditText. If you are unsure of how to do that, then copy and paste the following code. If you are uncertain of where to post this code, refer to the complete code tutorial by scrolling to the bottom.
Next, we will need two float values to store the first number and second number. We use float instead of integers because integers only hold whole numbers while float can hold decimal numbers too.
And finally, we need four boolean variables to check what operation is going on. A boolean variable returns only two variables — a true and a false. We check which button is pressed and use this boolean variable to perform the corresponding function.
Step 2: Fetching values from the elements into the working of our app
Inside the onCreate function, we will fetch all values and assign them to our objects. We do this by the following code
Here, we are fetching the value of ‘btn_0’, which is the ID of our button zero, and storing it in the object ‘btn_0’ that we created earlier. Though they are named the same, Android Studio can identify the correct one. But if it gets confusing for you, feel free to give either one of them any other names.
We do the same with our EditText.
Step 3: Changing the EditText value by pressing the buttons.
We use OnClickListener for this part of the program. This is what happens when you push one. The editText, first already fetches the value that it is already displaying, null in this case, and then adds 1 to it. If we don’t fetch the existing value, then it will become impossible to enter multiple digit numbers.
Do this on repeat mode for each of the numbers as well as the decimal. These are input buttons, and the code is the same for all. But remember to replace “1” with the appropriate value of the button you are adding to it.
Step 4: The functional buttons
Here’s the code we are using for multiplication.
We are using our first float value ‘Value1’ here. We use the simple function getText() to do that. Here since we pressed the multiplication button, we set its boolean equivalent variable to true. You will see how this is helpful in the ‘calculate’ button coding.
Now since after we press the multiplication button, we have to input another number. We set EditText to display the null value.
We do the same process for Addition, Subtraction, and Division. The only difference is that their respective boolean values will be set to True.
Step 5: Calculating, the actual functionality
Here’s the code of what happens when you or someone else presses the ‘=’ button after inputting another integer.
If you are a quick reader and just copy-pasting code, then the above code is not the complete code, it only checks for subtraction.
A couple of things are happening here. Firstly, we are fetching the value that you entered after pressing one of the four functional buttons (+, -, *, /) and storing it in the float variable ‘Value2’.
Next, we execute an if-condition to check whether our four boolean values are true and then run its subsequent code. In the above example, we are executing only the if condition for subtraction. For the full code, refer to the code below.
The main operation is happening in the ‘ed1.setText(Value1 – Value2 + “”);’ line. For other functions, replace the – sign with others.
Now write the code for all functions and run the app. If you do the first operation
You’ll get the right answer as
But there are still a lot of flaws in this app. And that’s why this is a basic version of the app and not an advanced debugged version.
Flaws of this android calculator app that are not covered in this post
- We are only using two float values. So 2 + 2 will be 4. But if you do 2 + 3 + 4, you will get 7. It will store only the last two input values.
- The app crashes when we press any one of the functional buttons. This may require either and if-condition statement or a try-exception. Something that we will learn later on in an advanced calculator post
Check out some more of our tutorials on Android.
Full Code for the User Interface for Android Simple Calculator App
Full Code Tutorial for the Functionality of Android Calculator App
Remember to change your package name to what you are using!
About the author
Asem has a Bachelors Degree in Computer Science.
Back to course page
Share and Support

2 thoughts on “ Build a Simple Android Calculator App in 5 Steps – Full code tutorial and explanation ”
tҺe website іѕ really good, I really like your website!
bhai please iski apk aap send kar do…….whatsapp-9373115274
Leave a Reply Cancel reply
This site uses Akismet to reduce spam. Learn how your comment data is processed.
Источник


